Replacing rotary encoder in Das Keyboard 4
July 22 update: turns out the rotary encoder is probably fine and isn’t the root cause of reliability problems. I have written another blog post on how to add hardware debounce.
I have a Das Keyboard 4 with a volume knob that sometimes registers multiple times when rotating the knob, sometimes in the wrong direction. This indicates a bad rotary encoder.
Let’s see what encoder the keyboard has. Pop off the volume knob by pulling it straight up. It may need some force if you’ve never done this before, but nothing excessive. There we can find a rotary encoder with “CTS” marked on its side. After spending a bit of time, I was able to find the closest match on their website: CTS Series 290 rotary encoder.
Reproducing and visualizing the problem
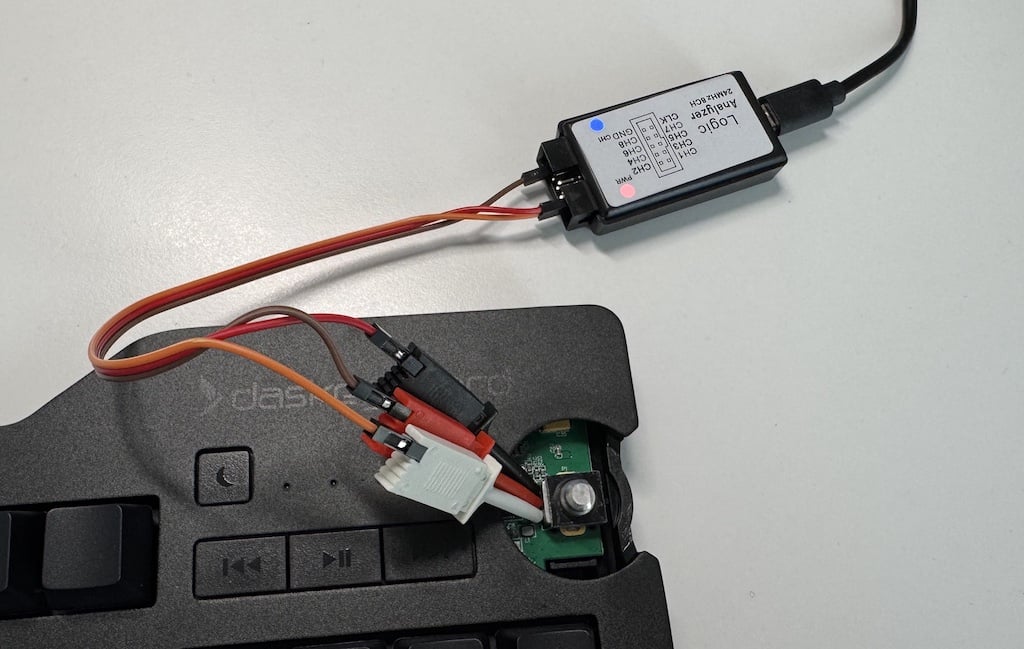
According to the data sheet, the middle pin is the ground, and the other two pins are output pins. The rotary encoder shorts these two pins to ground (middle pin) to generate the signal. Let’s connect a cheap logic analyzer to see what’s going on with the signal. I’ve used PulseView to record the signal.
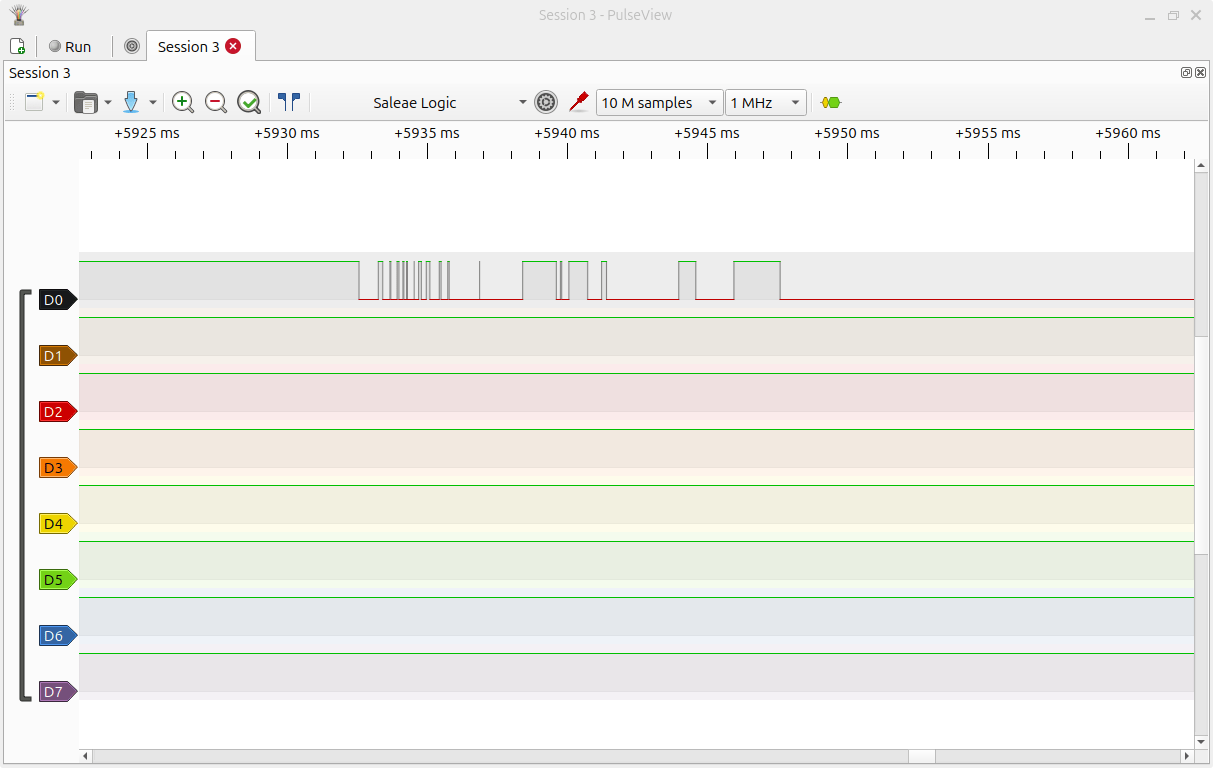
We can see here that the rotary encoder is too chatty. According to the data sheet, contact chatter should last up to 3 ms, but here we can see contacts bouncing for around 15 ms, which is way out of spec.
Finding a replacement part
The datasheet has no variant with such a short shaft like the one we have here. This means the part we’re dealing with is custom made for Das Keyboard and isn’t available off-the-shelf.
This is where I got stuck for a while. I even considered options to buy the version with the shortest shaft and cut or grind it down to be even shorter, however, that would still have made it too tall compared to the original.
The closest match is 290VAA5F201A2. All the specs are the same except for the shaft length.
Turns out the rotary encoder itself is modular, so it’s possible to reuse the shaft from the old encoder and put it into the new one. Fortunately, the shaft is not the part that causes excessive chatter, so by combining the new and the old parts together we can get a fully working rotary encoder with the correct shaft length.
I ordered mine from DigiKey, but Mouser also stocks it. I’ve also found them on eBay, but they seem to be overpriced for the number you get.
Disassembly
Getting into the keyboard is quite straightforward if you have the right bit for your screwdriver - Hex 2.5 mm. Desoldering the old part without destroying it turned out to be the most painful part of the process. Some parts of the encoder are made of plastic, so you can’t just blast it with hot air.
Another problem is that the mounting pins are pressed tightly against the holes in the PCB, creating enough friction that the part is held in place even if there were no solder left. I can see why they did this: any slack in the mounting position would introduce too much variability and the volume knob would not be placed correctly against the metal cutout for the knob.
There’s black tape / spacer on top of the encoder that you need to remove before desoldering. We’ll put it back on the new one once it’s soldered.
Desolder the old part. Good luck :)
Combining the old and new parts
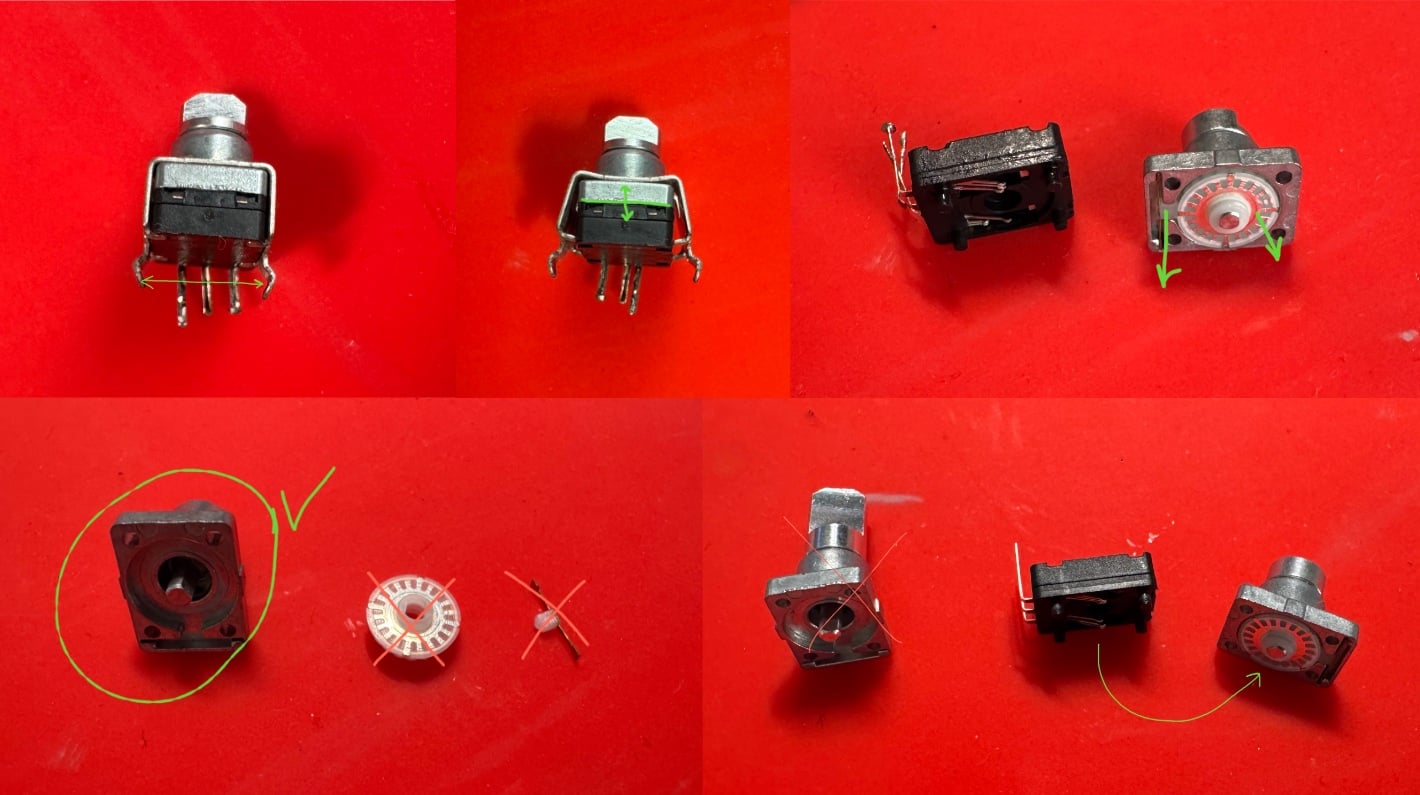
Step 1: removing the custom shaft from the old encoder
- Pull the mounting legs away from each other. The metal is soft enough this can be done with your bare hands.
- Bend it just enough to pull metal cover off.
- Pull away the plastic parts from the metal shaft. They are held together with 4 cylindrical plastic pins. Be super careful here because the contact pins that brush against the encoder ring are exposed, and bending them would likely make the encoder not work properly!
- Pull the plastic encoder ring and then also the little retention pin out.
- Take the metal shaft and put it away - we’ll use it later. The rest can be thrown away.
Step 2: disassemble the new encoder and combine parts
Follow the same process from Step 1 with the new encoder. Once you get to the last step, we’ll do the opposite: we’ll use everything BUT the shaft from the new encoder.
- Take the shaft from the older encoder.
- Put the retention pin into the old shaft.
- Put the encoder ring into the old shaft.
- Put the combined shaft onto the plastic parts from the new encoder.
- Put the metal cover over that and bend back the metal to take its normal shape.
That’s it, you’ve made the custom part that the keyboard needs!
Step 3: verification
This is not what I’ve done originally, but in hindsight that would have saved me a lot of time. Once you rebuild the new part, use the logic analyzer to verify if the new part is working properly. I’ve soldered the new encoder only to realize it’s also just as chatty as the old one. Had to redo this multiple times.
Some random tips
- Verify if the new encoder is clicky. Some encoders that I got (brand new!) were not clicky for some reason. Only after soldering I’ve realized they’re super dull and not fun to use.
- Be super careful with flux - don’t let it get inside the encoder!
- Isopropanol causes the encoder to become squeaky. At first I didn’t realize that it was isopropanol that I used for cleaning flux that was causing this and wasted a bunch of time resoldering new encoders.
- The encoder seems to be quite heat sensitive. If you melt the plastic parts inside, it’s game over.